STARTING SMALL: Prep is Key
Welcome to the fourth installment of our blog series — Starting Small: Adventures of Starting a Small Business. Here, we’ll be sharing stories and lessons we learn on our journey as full-time small business owners.
This week’s topic is “prep is key.”
Festival season is here! For some people, festival season means lots of events at which to drink lots of beer. For artists and makers, festival season is our BUSIEST time of the year. It feels like there is some type of festival, market, art show, pop-up shop, etc., EVERY weekend. And I don't know about other makers ... but we find it hard to keep track of all the details for all our upcoming shows. So, we've come up with three key steps that help us in preparing for festival season. These steps may seem a little overwhelming, but each one is key in helping us stay organized. Plus, they help speed along both our overall production process AND setup at the actual shows and markets.
1. MANAGING SHOW DETAILS
From September thru November, we currently have 9 markets/shows on our calendar (and we haven't even finalized December, yet). Last year, I believe we only did 4 shows — total — from September to December. But this year, we are full-time entrepreneurs. Which means we're going FULL STEAM AHEAD.
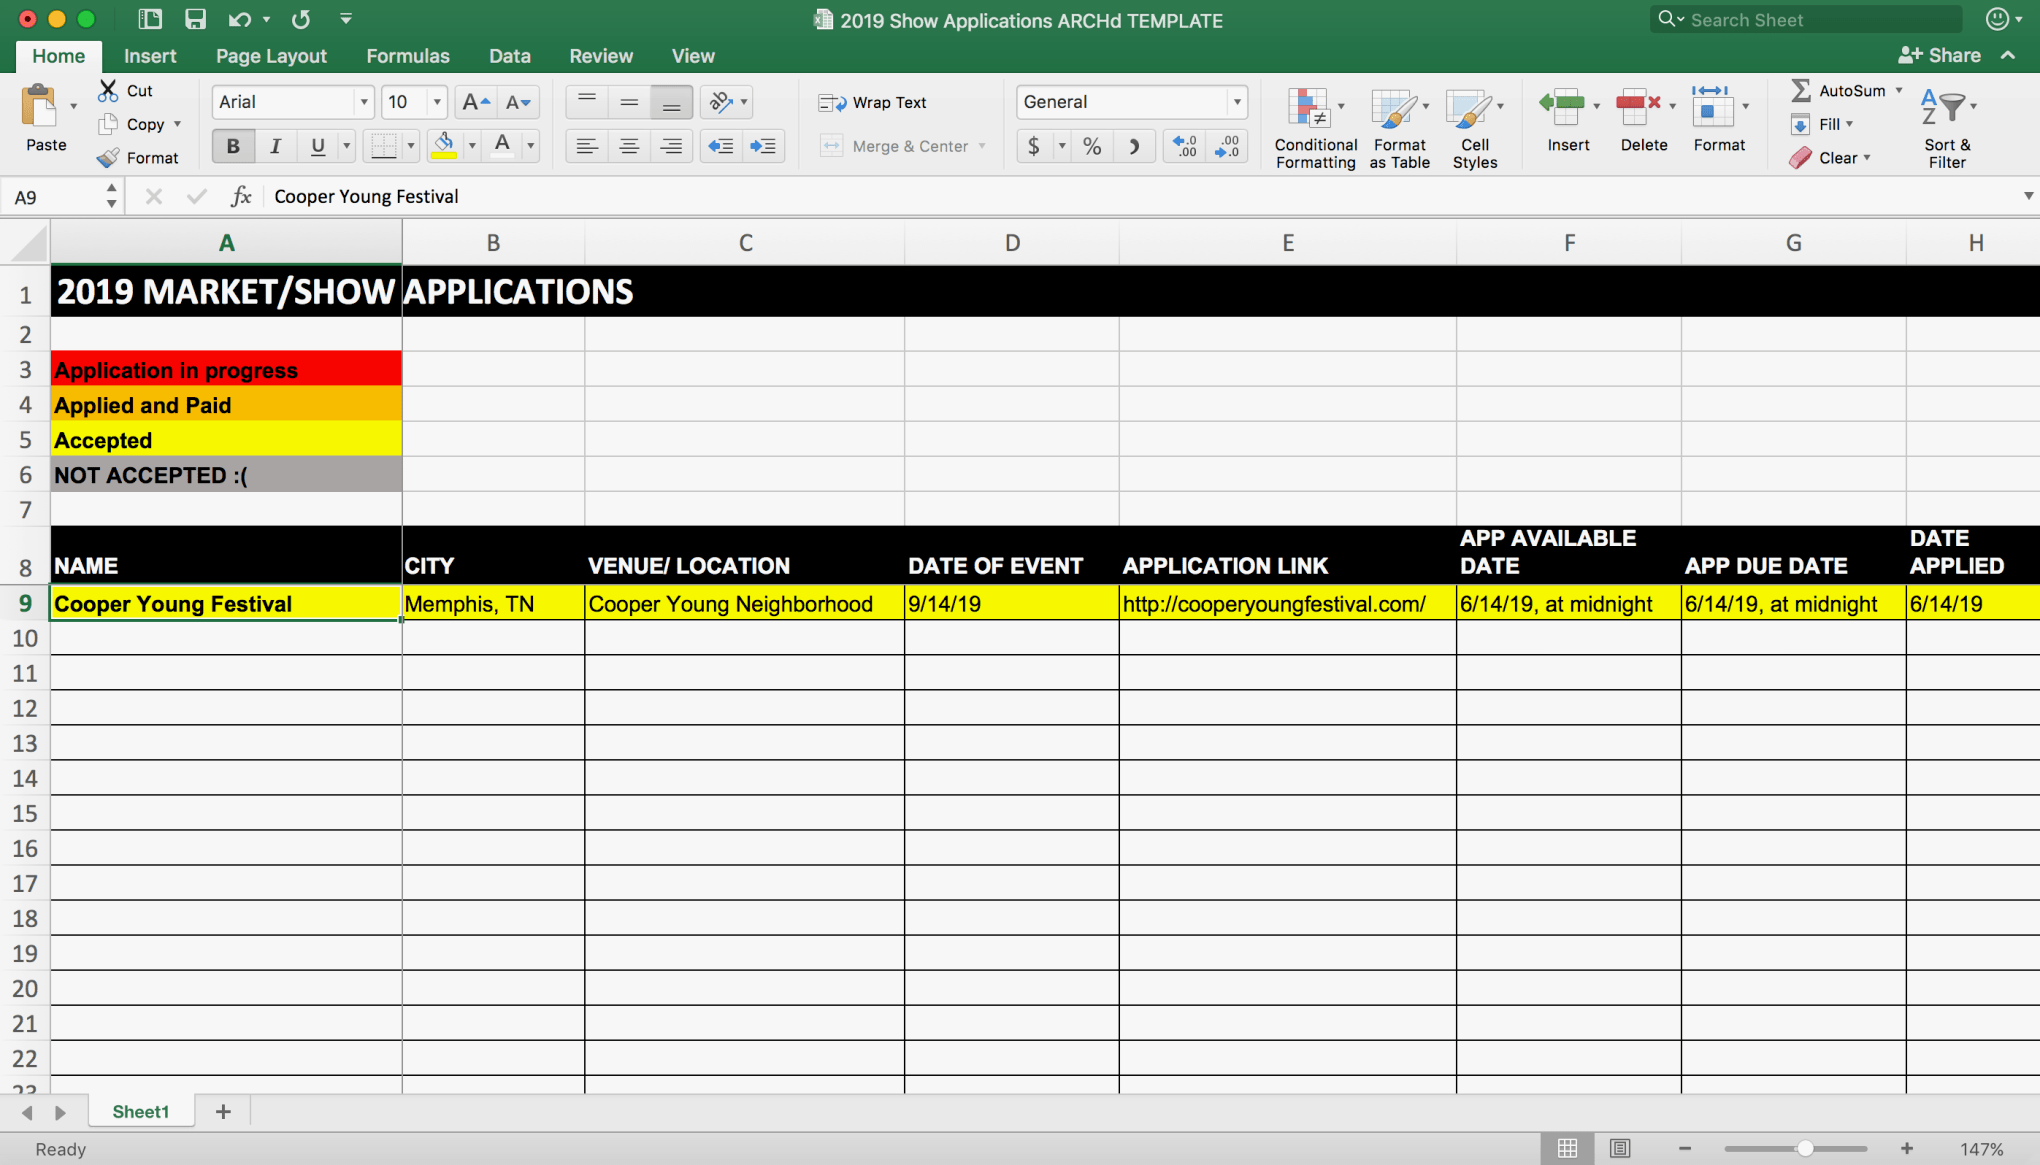
While applying for all the markets this year, we started confusing the details for each show. What booth size is this one? Have we paid the vendor fee, yet? How much did we pay? Is that application live, yet? What date is that show? Are you sure we didn't apply for another show on that date??? And so on and so forth. In order to keep track of all the details for every show we applied for, we decided to create a master spreadsheet. On this spreadsheet, we included EVERY possible detail we might need for every show we applied for or were thinking about applying for. From the name and location to the date the application goes live. From the app due date to the date we expect to hear back about acceptance. From the booth size to whether electricity was an option ... ALL the details are now kept in ONE place.
Want your own spreadsheet? You can download the blank version of our template below by clicking here (we left Cooper Young Festival in there for reference).
2. BOOTH LAYOUT
I don't remember when we first implemented this step — I just know we've been doing it for a few years now and it's become a huge time saver.
The problem with planning out the perfect booth display is NO EVENT has the same sized booth because THAT would just be too easy. For example, our upcoming Cooper Young Festival booth is 10' wide by 15' deep and also happens to be on a corner. Our market the following weekend is 10' x 10', with a 6' x 8' booth and a 12' x 12' booth the weeks after that. Consensus? It's impossible to keep the exact same booth layout for every market/show when the booth sizes aren't offered in ONE SIZE FITS ALL. Plus, depending on the time of year, we focus on different types of products, which affects the type of displays we use. During the holiday season, we go heavy on ornaments and incorporate a Christmas tree, but buyers aren't really that interested in ornaments at March shows.
To create booth layouts for some of our earliest shows, we used to pop our tent up in our backyard for a "dress rehearsal." We would physically set up our actual displays and furniture pieces in the appropriate spots underneath our tent. We'd then take pictures of everything and print them out for the actual day of market/booth setup. That started becoming a LITTLE tedious after, like, the first time. Now, we lay out our booth electronically by creating an overhead view in Adobe Illustrator.
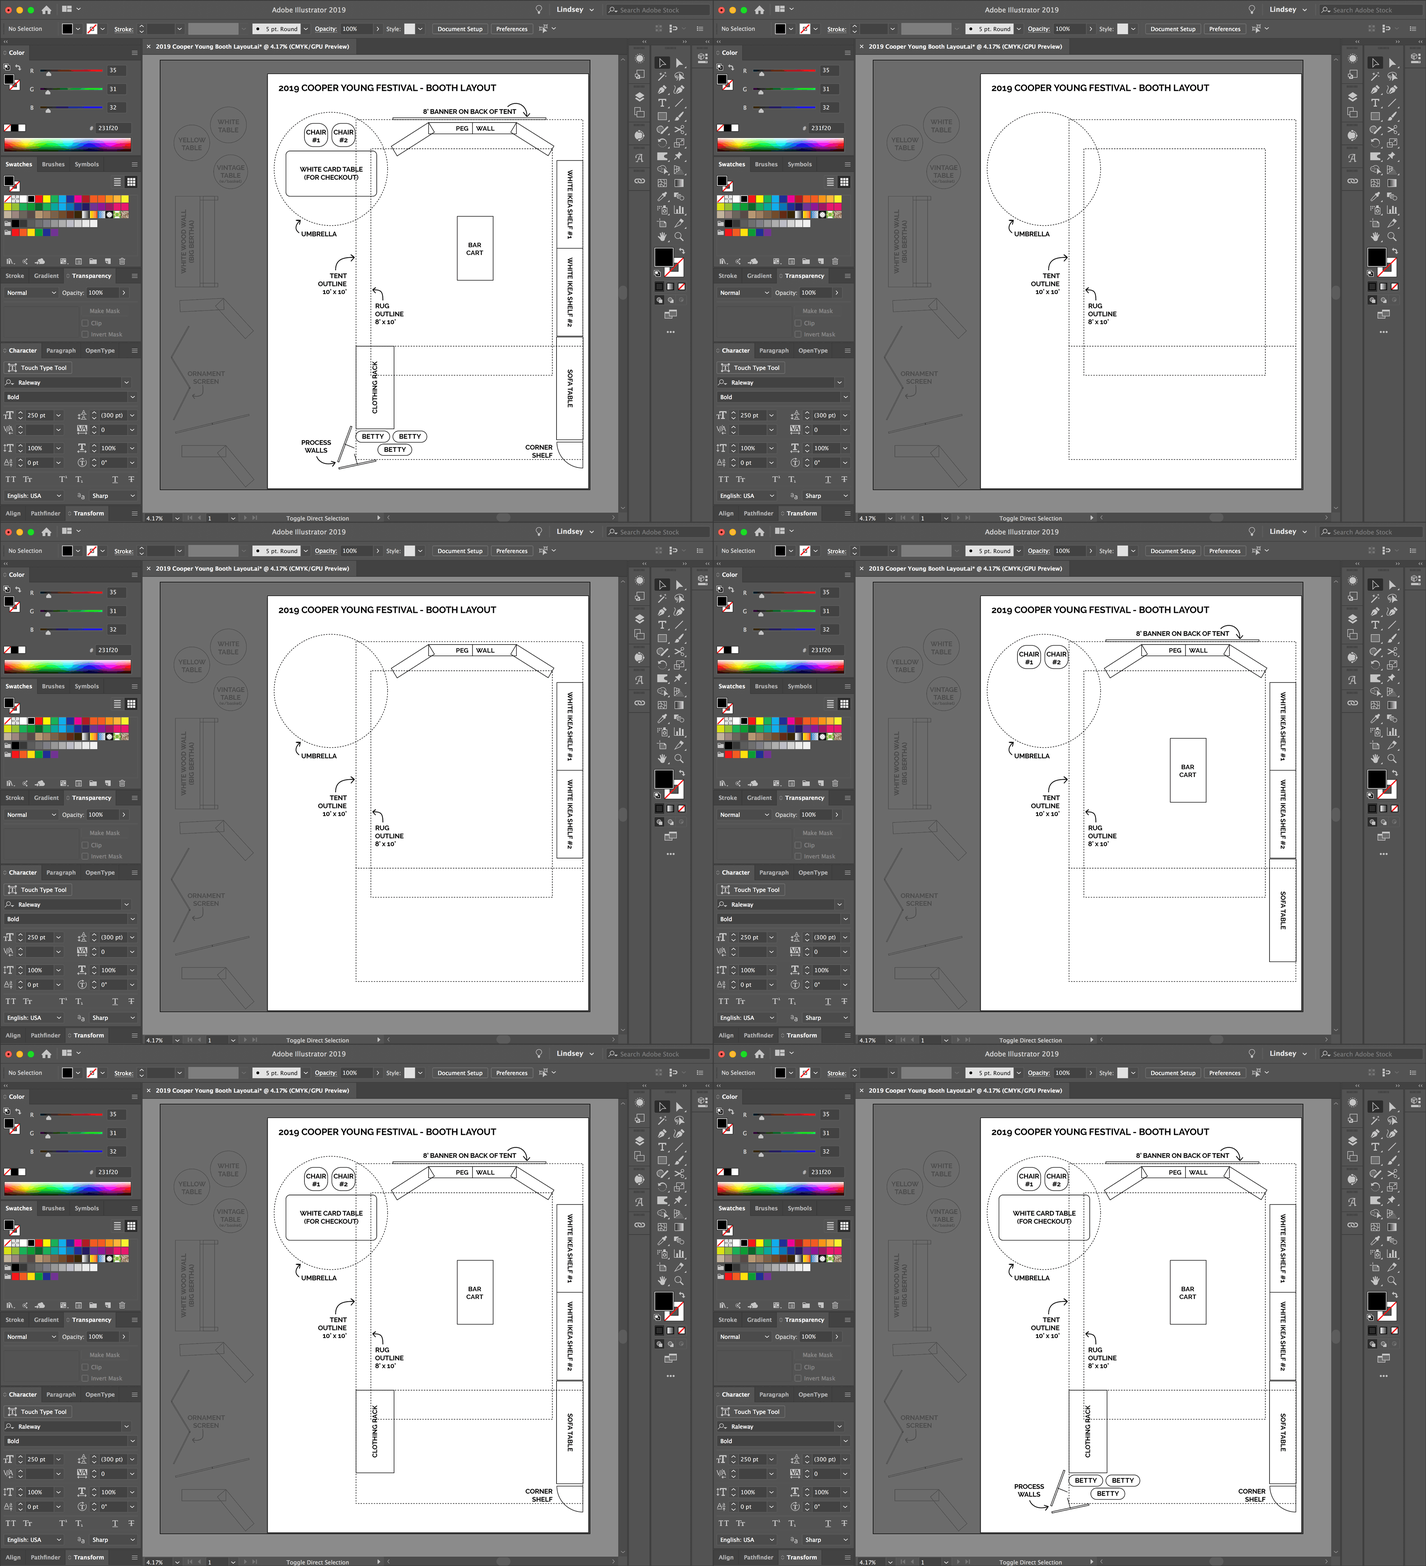
To do this, we've taken overhead measurements of every display piece we could possibly use for a show. From our largest wood wall display (nicknamed Big Bertha) down to our small process board easels ... everything has been measured and drawn out in the canvas area of a blank Illustrator file.
Once we're ready to start designing our vendor booth for a show, we open that template and start by drawing out a rectangle of the overall booth size. Then we drop in different display pieces and rearrange them until we're happy with the setup. Bonus: after you measure everything out once, you can reuse the same template file for each future event. Laying everything out to scale also helps you be prepared with what will and won't fit in your space before you get on site at an event (when it gets too hectic to change it). This also helps minimize sister arguments on-site.
DESIGN NOTE: Adobe Illustrator allows you to have an artboard size up to 226" x 226". For booths 10' x 15' and under, I create the layouts fully to scale. For double sized booths (10' x 20'), I size everything at 50% scale to fit within an artboard.
3. INVENTORY PLANNING
The final step in preparing our vendor booth for markets and shows is planning out all of our product inventory. We've learned the value of this step the hard way. Because for our first few shows, we produced everything we could think of, with no rhyme or reason as to how it would all eventually fit together in one booth. It made setup day hectic and disorganized. Now, we're a little more calculated in our efforts.
Since we work out of our house, we don't have a ton of extra space to keep inventory. So, our items are mostly all made to order. Which means for shows and markets, we're making all of the items specific for that market in the weeks leading up to the show. But how do we decide how much to bring?
Once we have our booth layout completed (step 2), we know what display pieces we'll be using at an event. To help plan out how much inventory can fit on those displays, I recreated drawings of our larger displays in Adobe Illustrator, to scale. Like this IKEA's FJÄLKINGE white shelf unit I made below for our upcoming Cooper Young Festival booth inventory.
This shelving unit has adjustable shelves which fit into designated holes in the outer frame. We set the shelves at different heights based on the inventory we plan on displaying at each particular show. To make it easy and accurate during the layout process, I drew out small lines to the left of the frame to mark the measurements for where the shelves can actually go. That way, I can move the shelves up and down in my mock-up during the inventory planning step to fit the different products I want to display. See below for an example of a recent show's early mockup and actual setup.
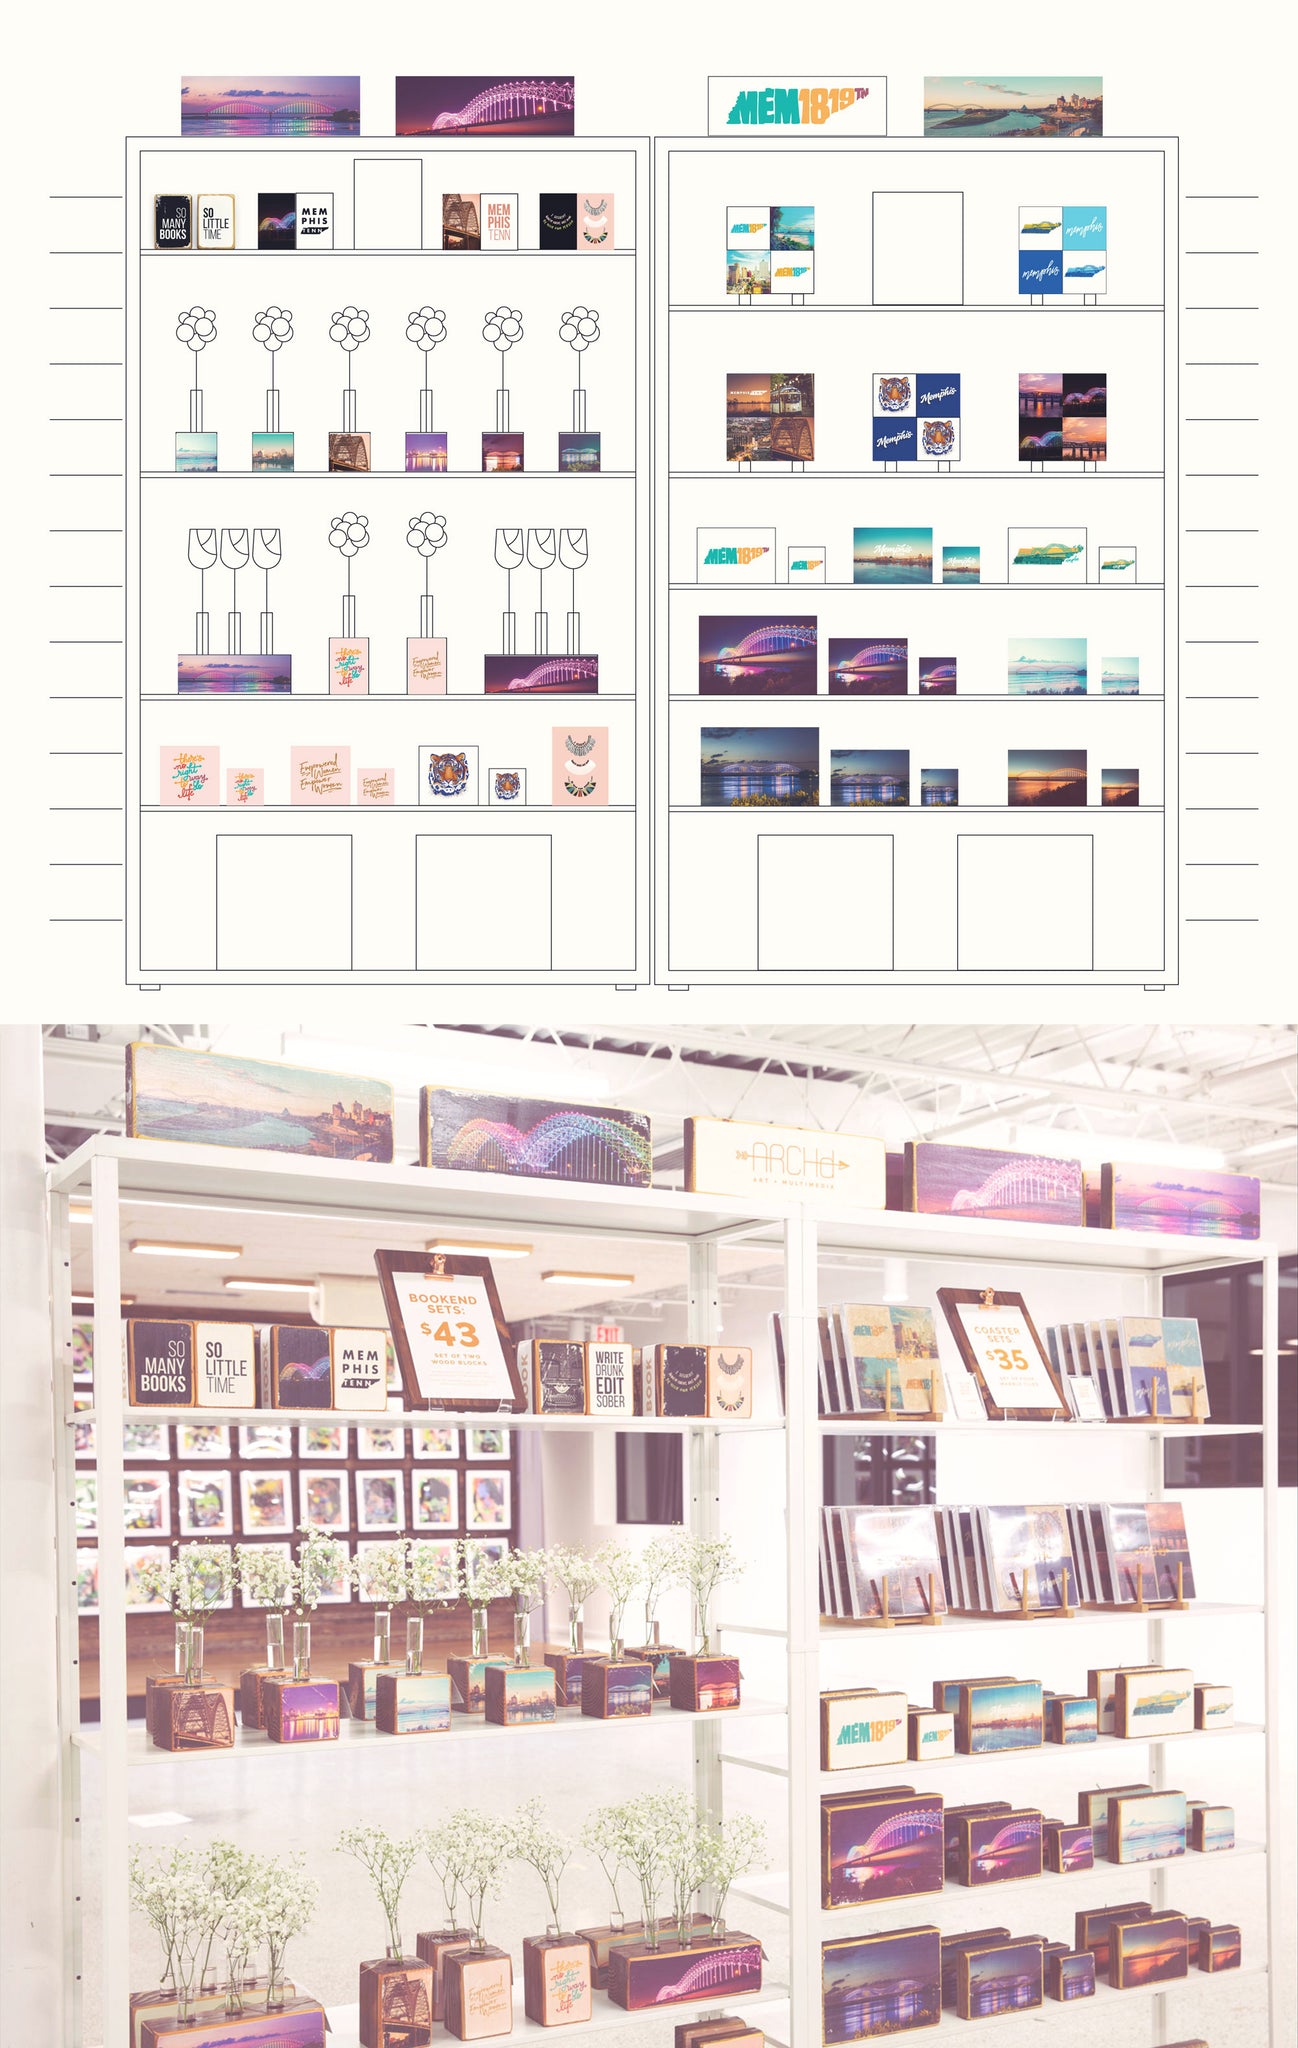
We already have all our art in Adobe Illustrator files, as that's what we use to lay out our print files for transferring the images to the faces of wood and marble. I have one large Illustrator print file that holds all our recent designs, which I can pull from when planning out the inventory for each show. We simply decide what we want to bring and drop it onto the shelf, though some rearranging is done onsite as things begin to sell.
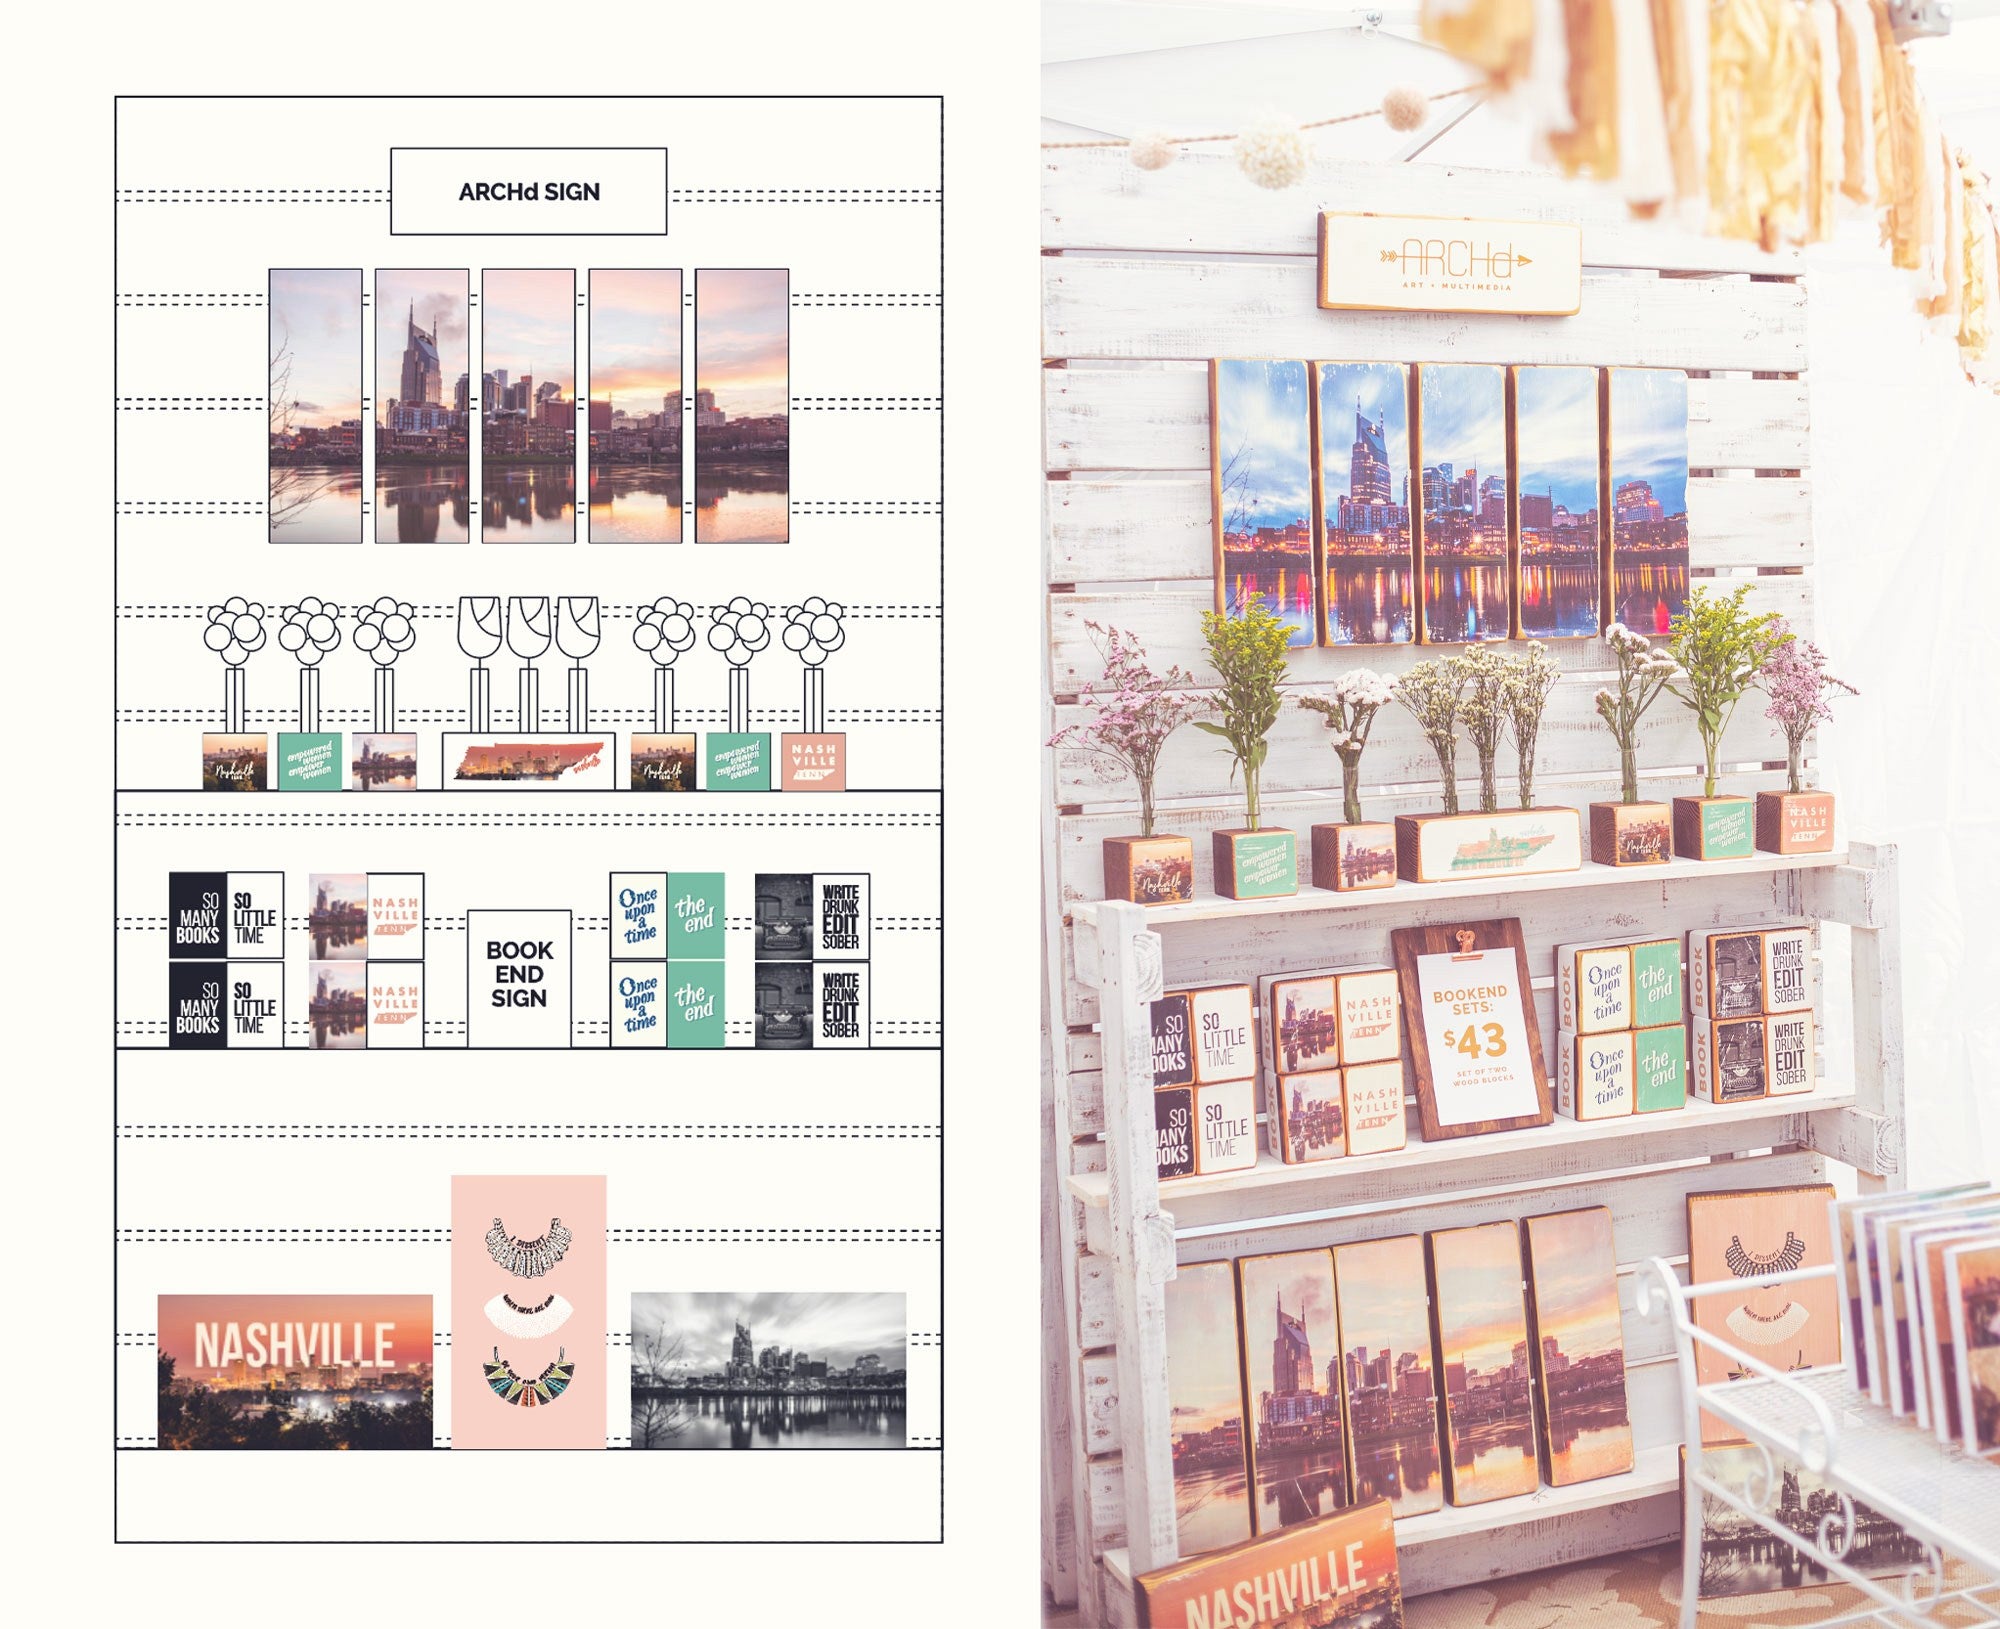
We do the same for each larger display piece, including our larger white wood peg wall. We also print out these mock-ups and bring with us to our shows, so we (and anyone helping) can quickly unpack the art and get it set up in the correct spots.
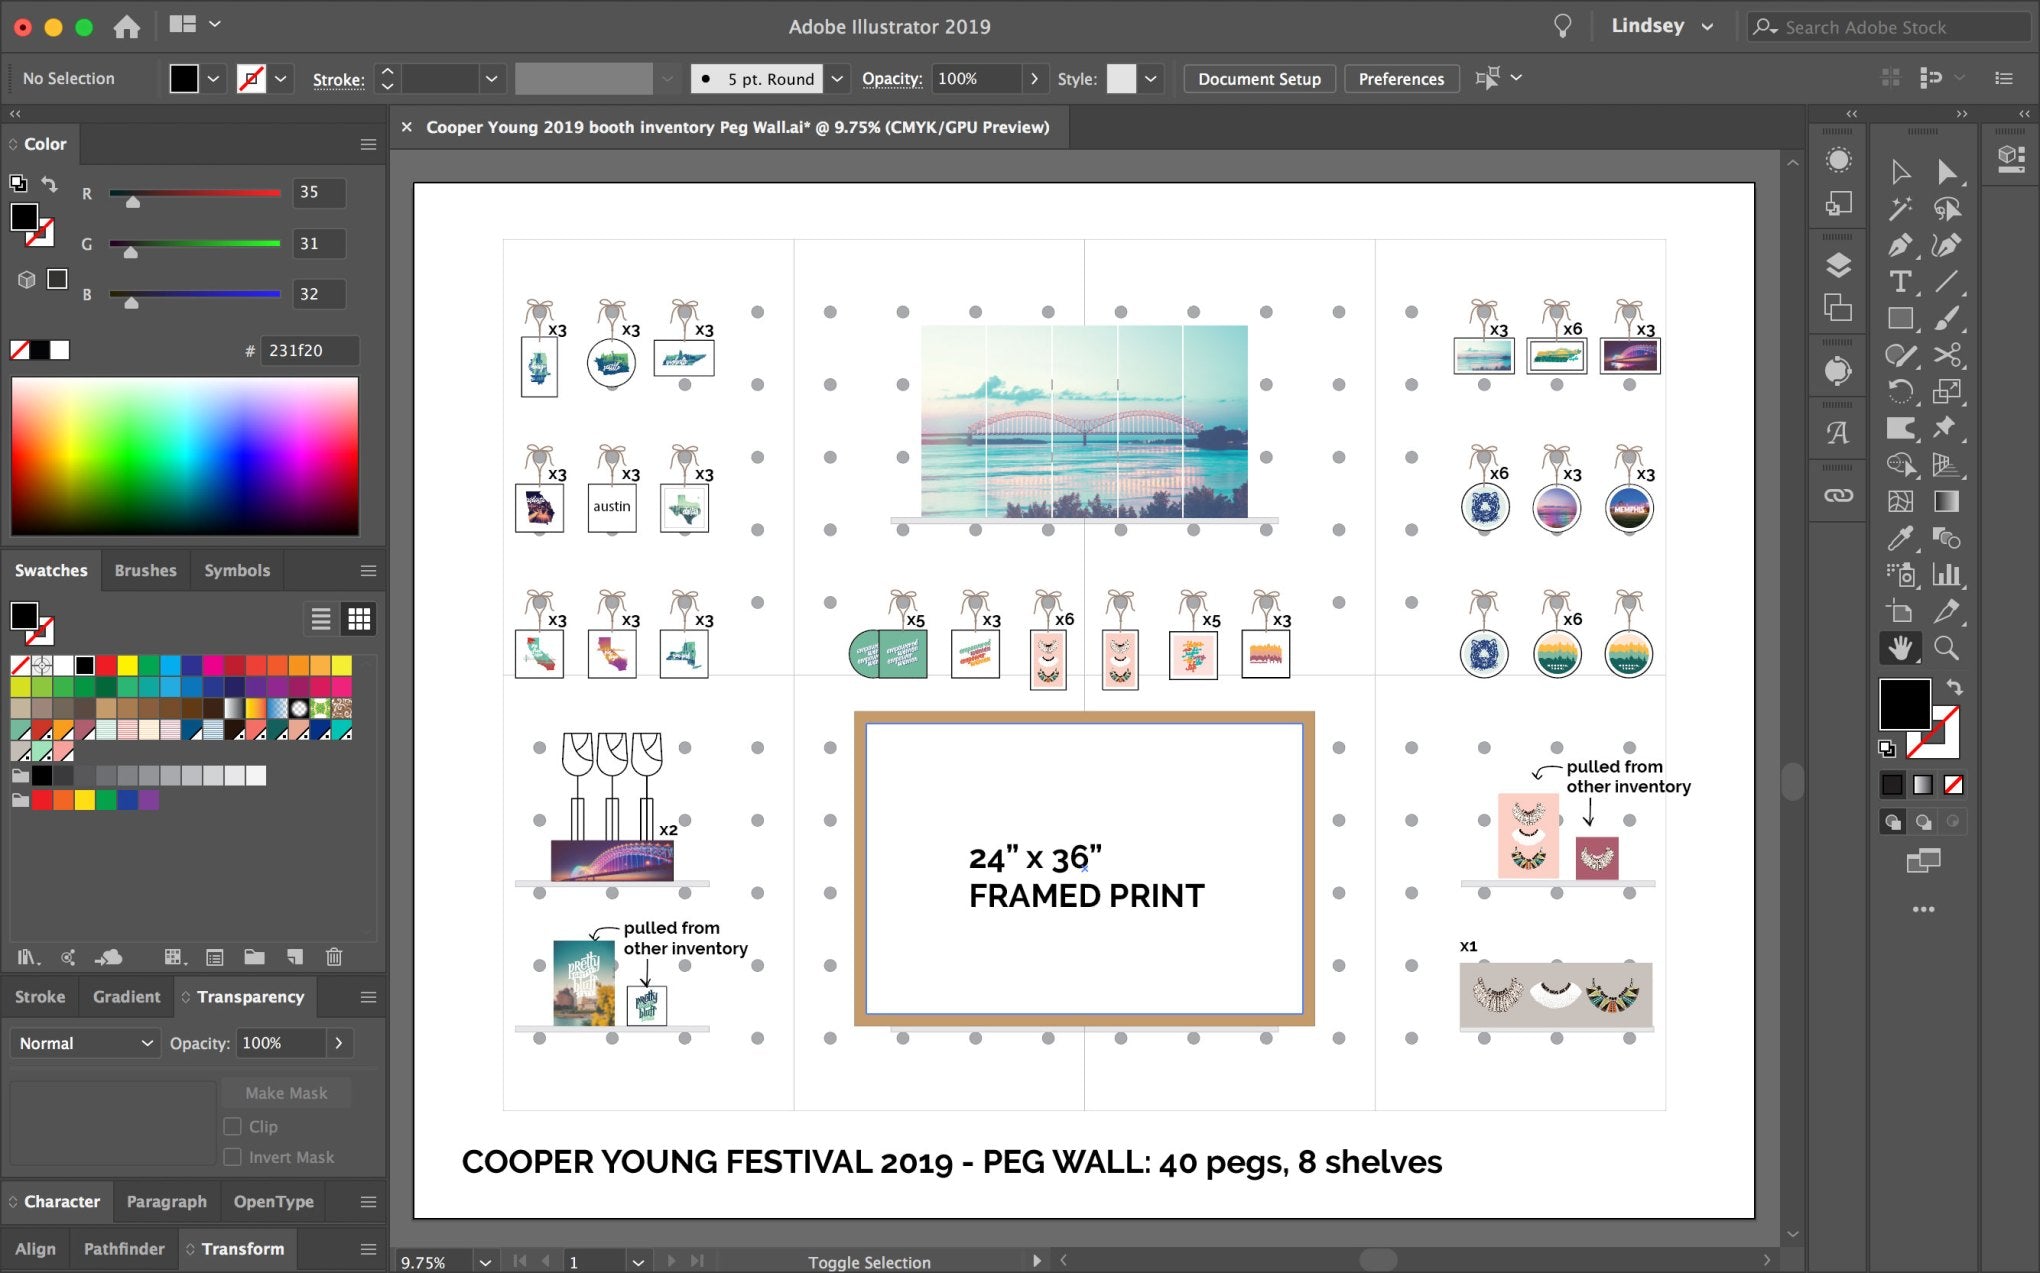
Once we have everything laid out, we go back and add quantities next to the items. Then, we take those quantities and enter them into an excel spreadsheet that calculates how much revenue our inventory could potentially bring in. We adjust quantities as needed to come up with our total inventory goal of bringing twice as much product as we hope to sell.
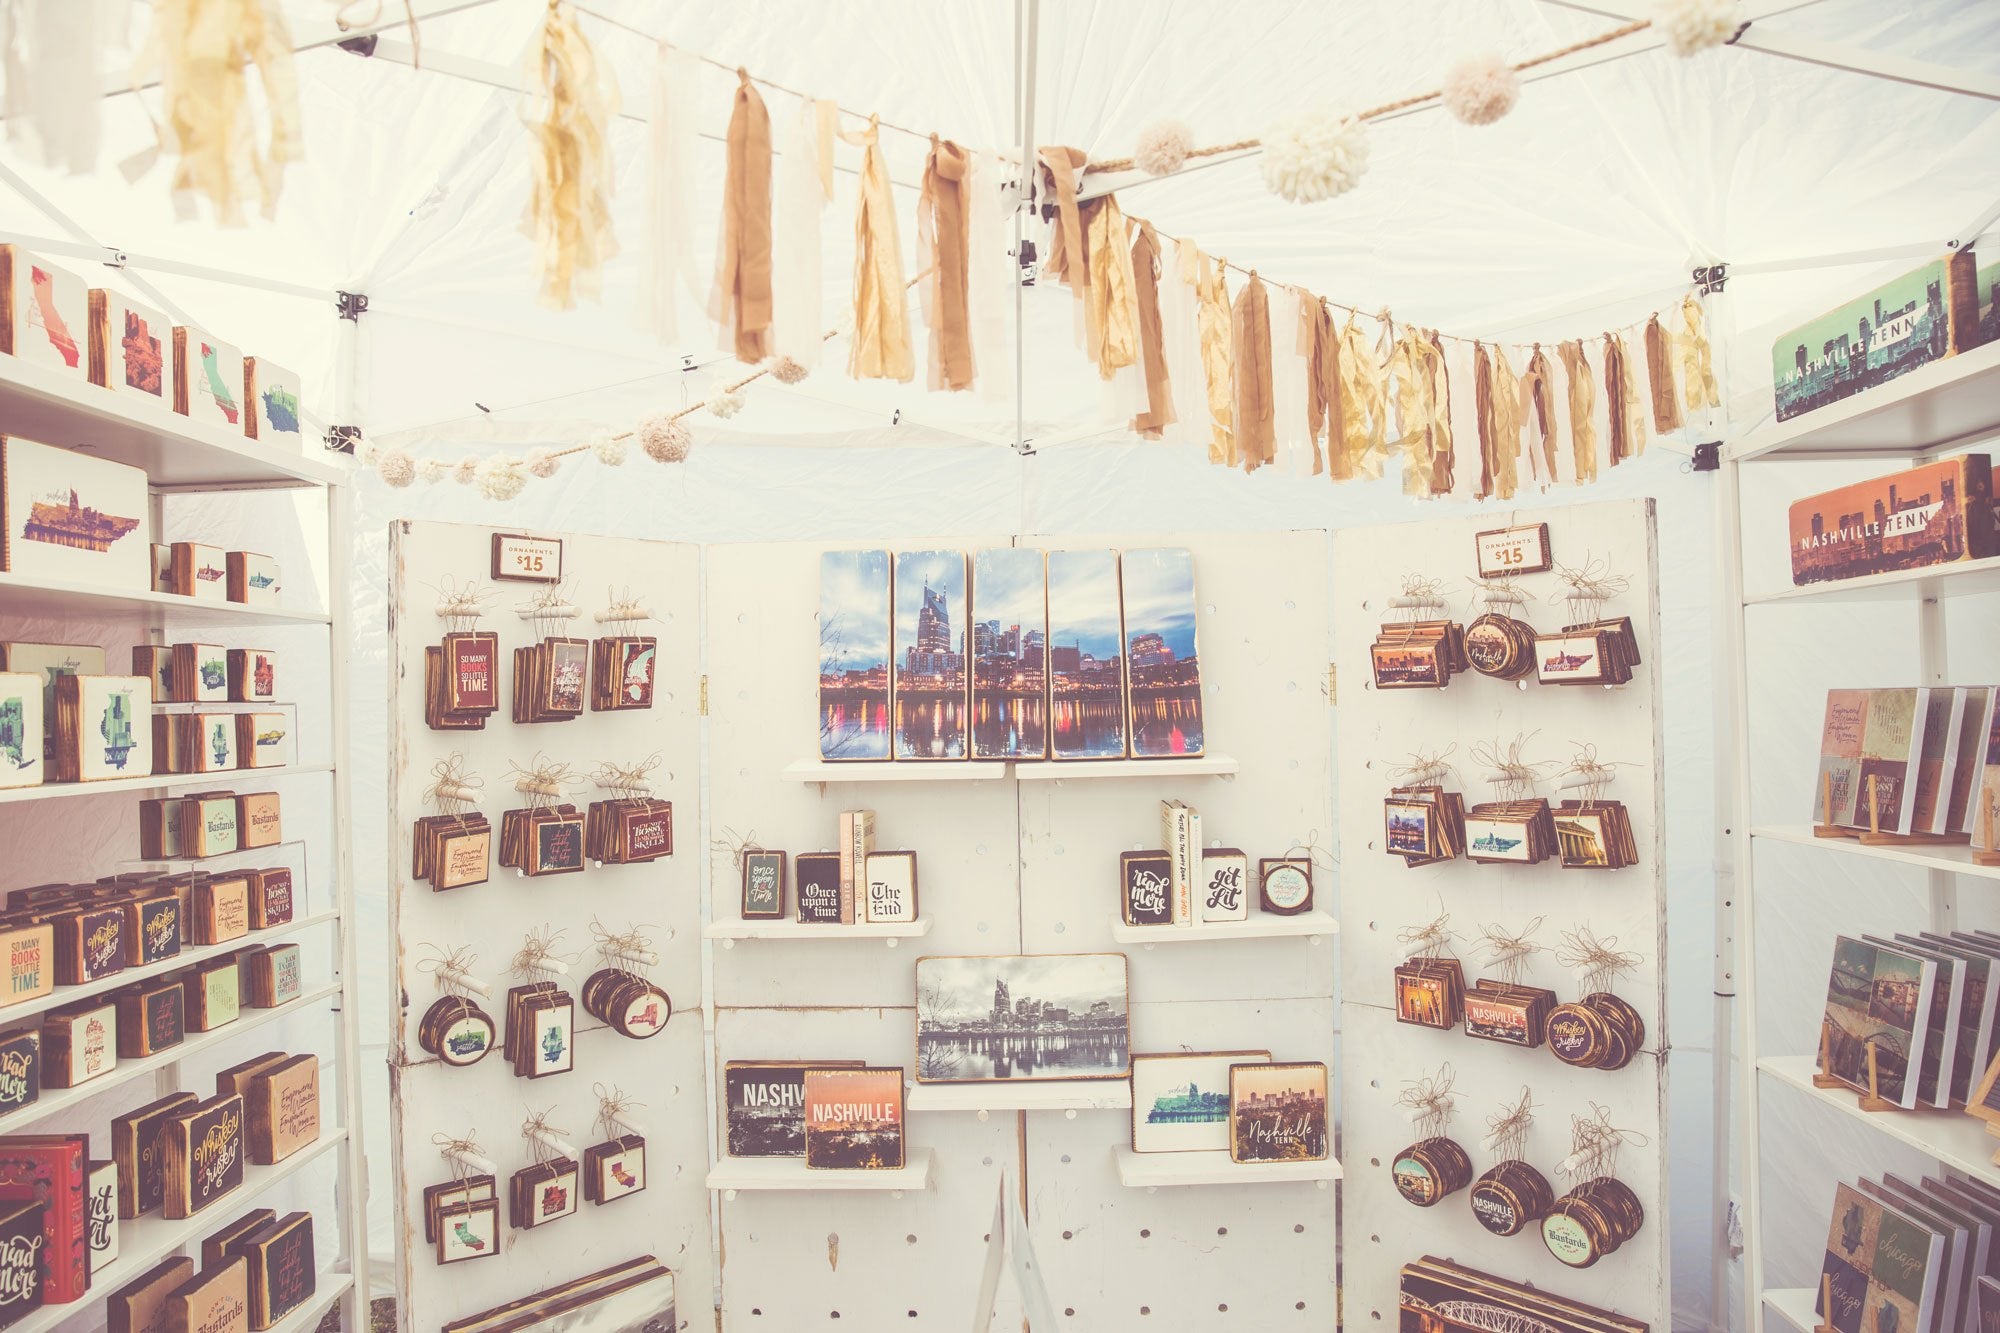
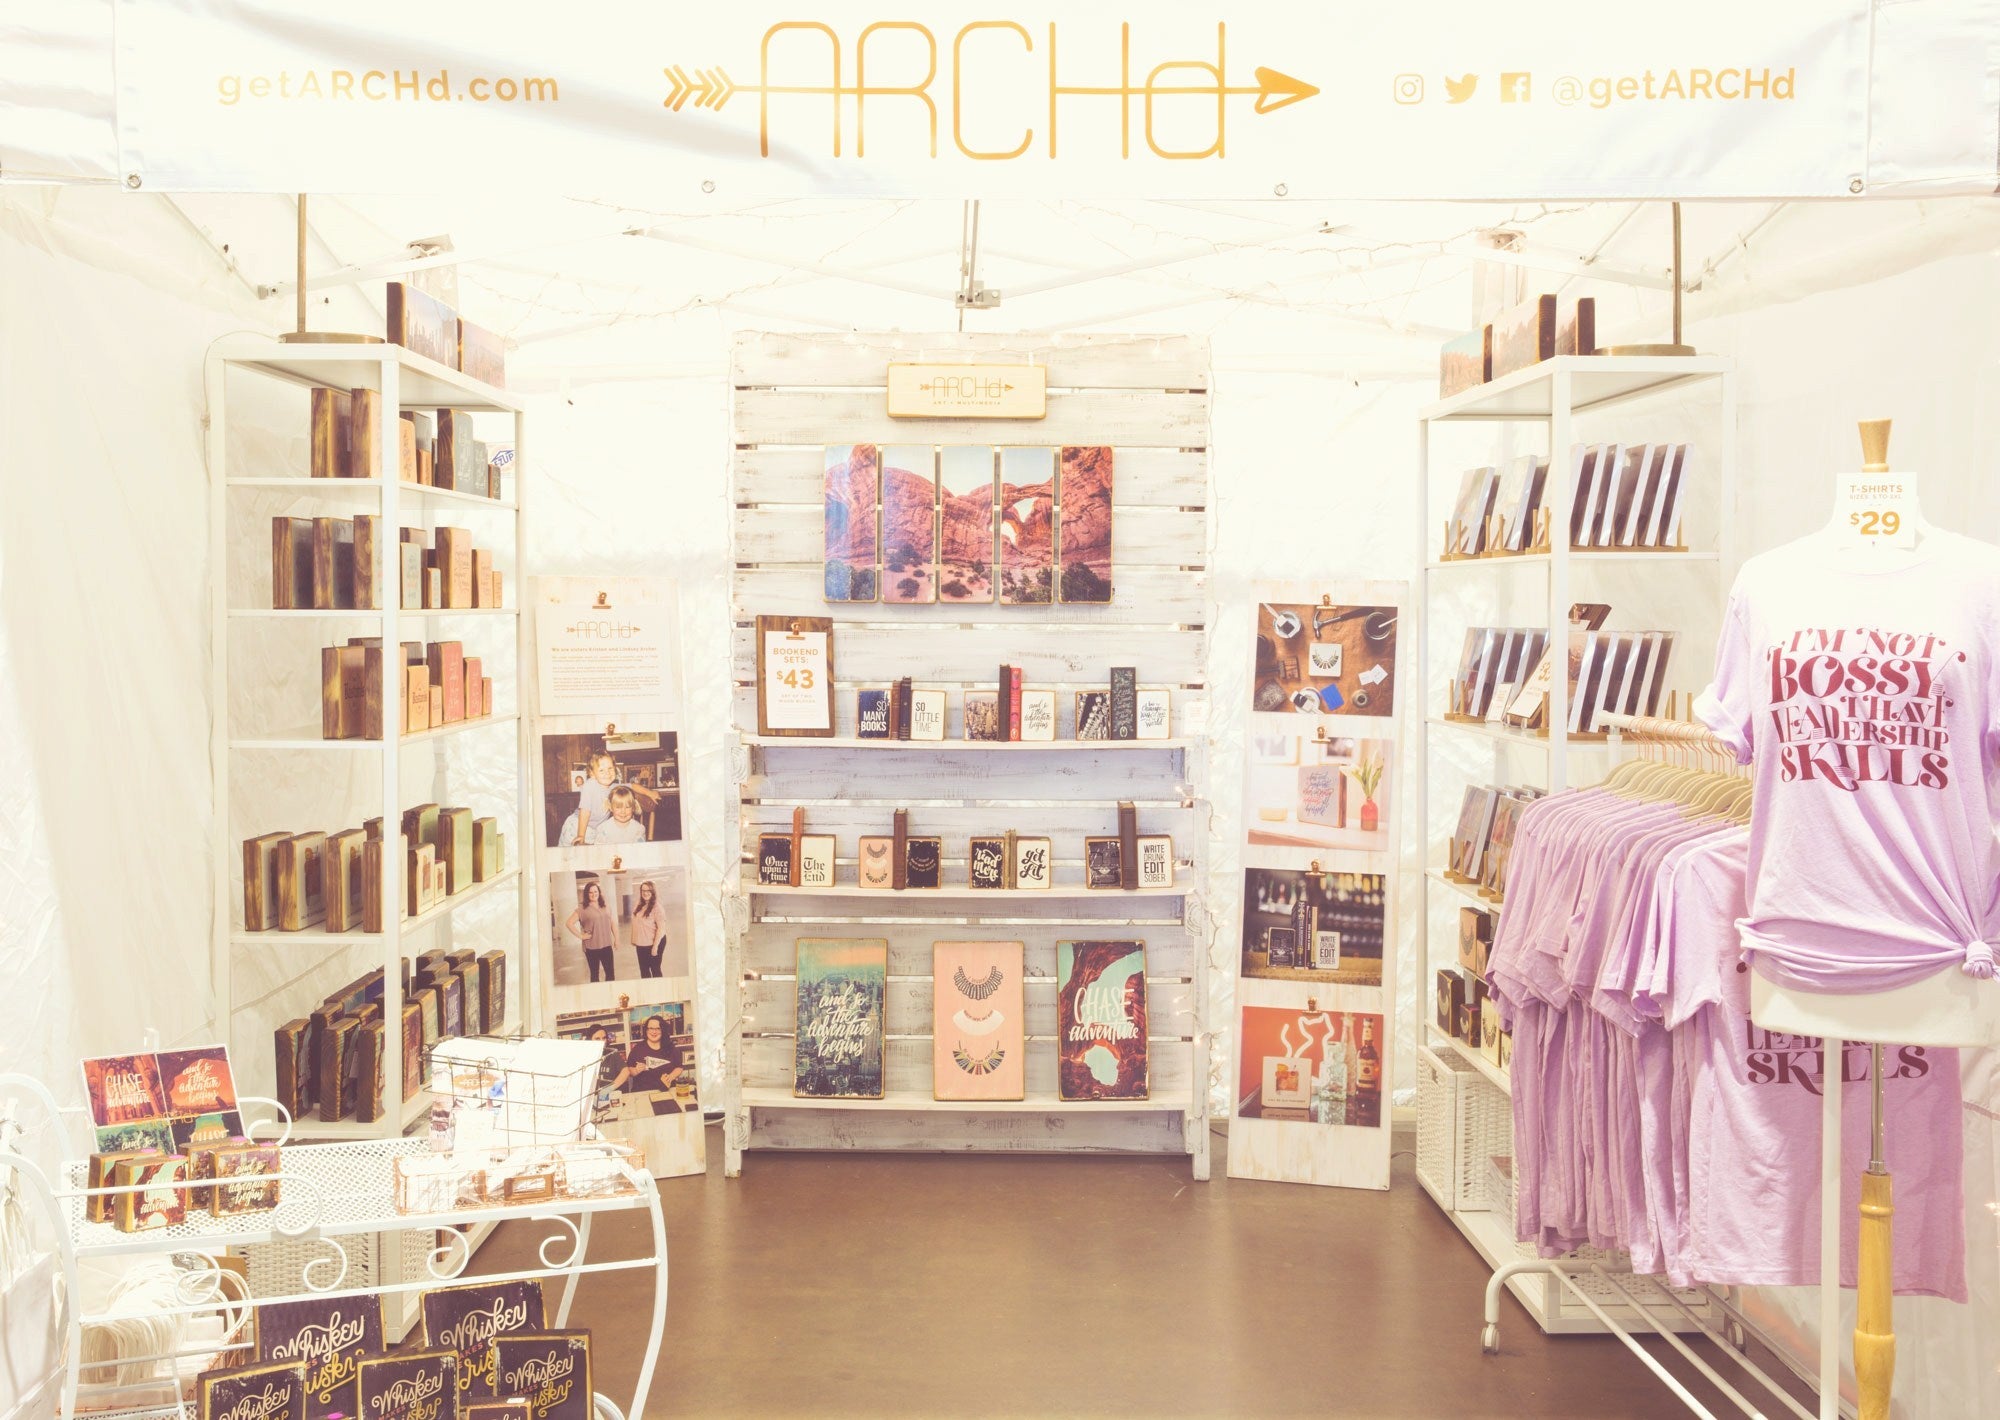
The screenshots included in this post are for our upcoming booth at Cooper Young Festival, so we don't yet have photos of the finished booth. But here are a few additional photos of some past vendor booth displays to give you a better picture of how those mock-ups come to life.
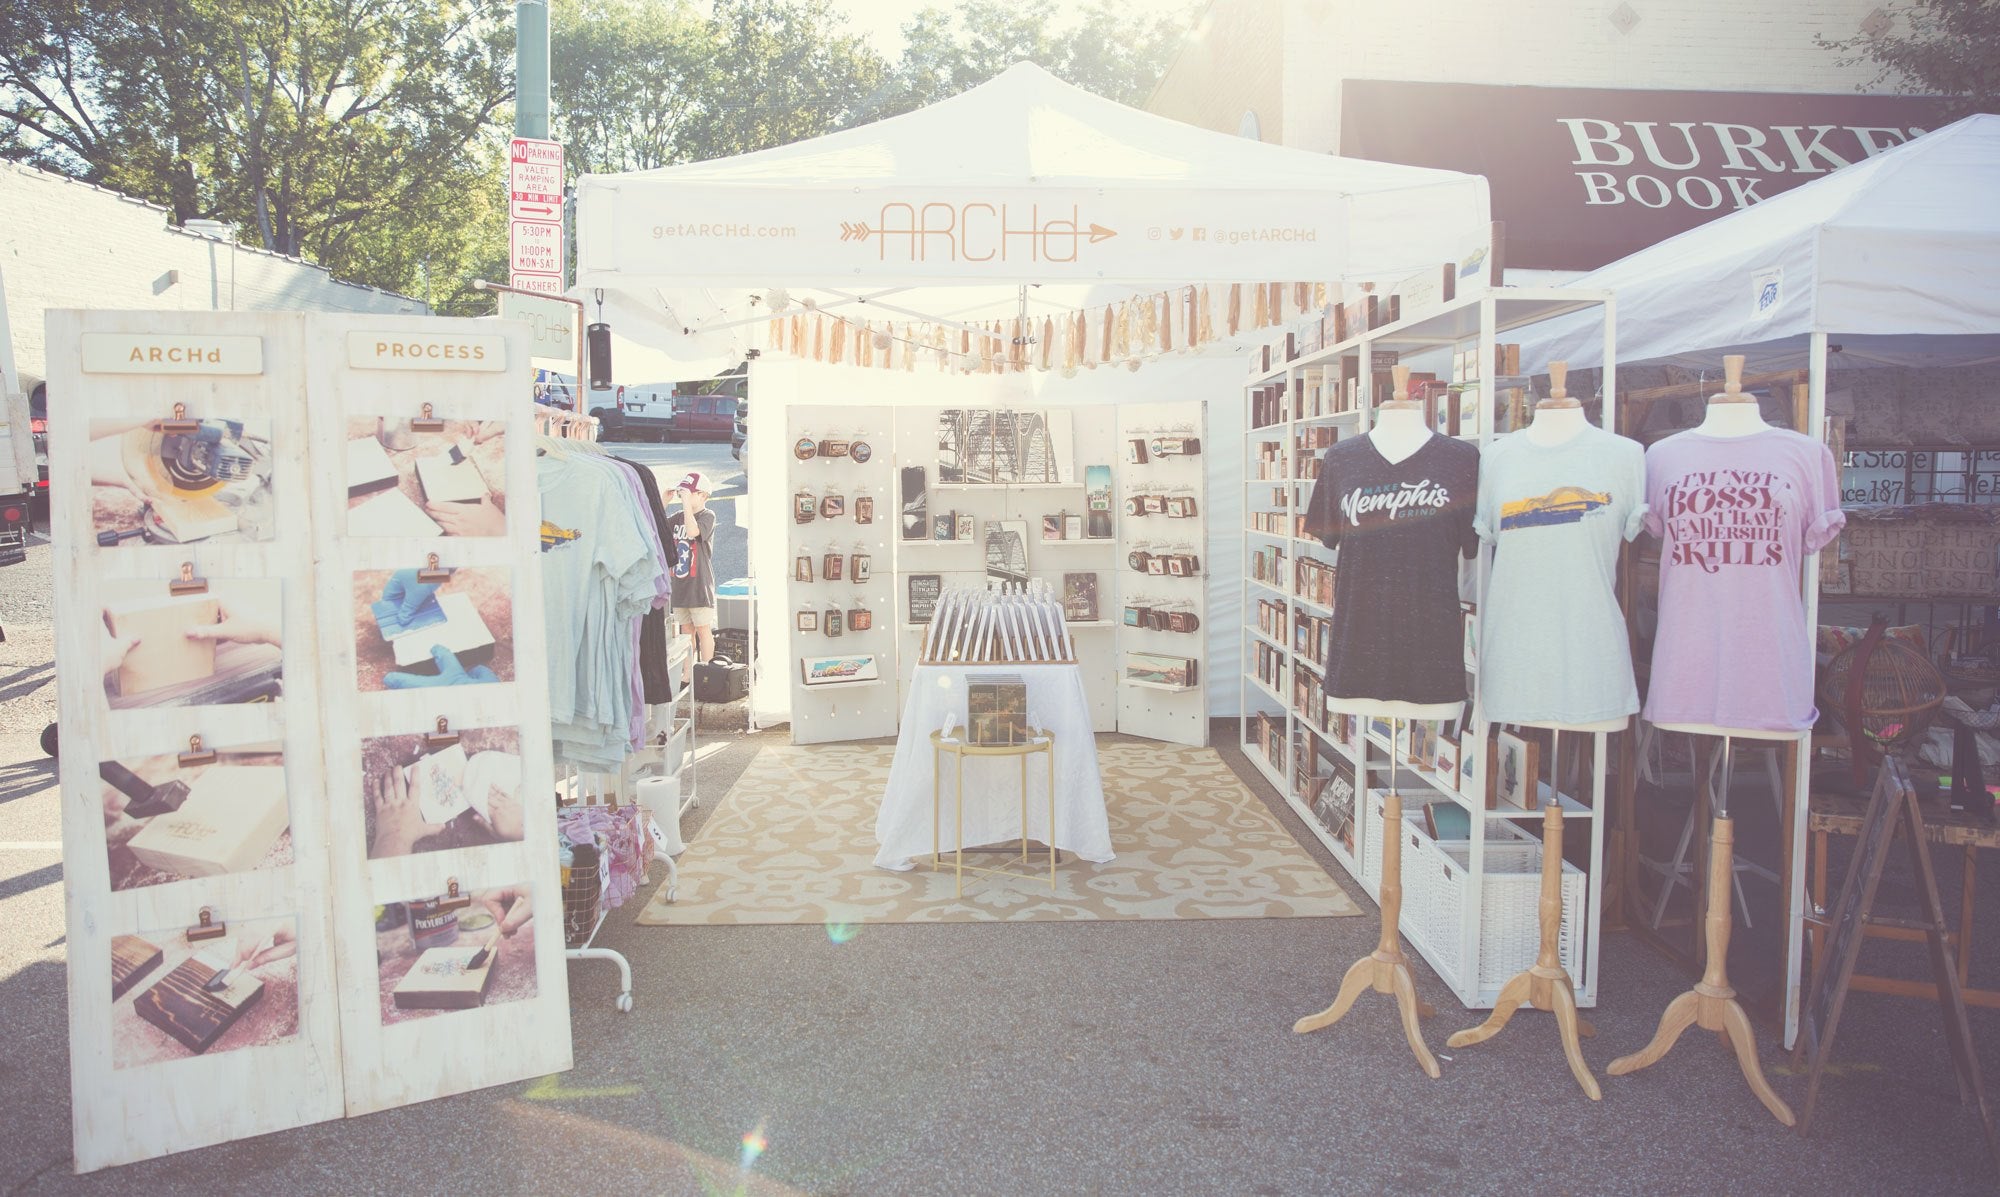
TAKEAWAY: PREP IS KEY
This is how WE prepare for festivals and markets. We encourage you to dedicate time to preparing for your shows and hope these tips help make some of your processes more efficient.
Lindsey & Kristen


Leave a comment